RV Tips – How to Dump the Black and Grey RV Tanks
When we purchased our first ‘real’ RV we were a little afraid of dumping the black and grey tanks. We quickly learned the RV dumping process is easier and cleaner than we could have imagined…although it took some mistakes in the beginning to figure this all out!
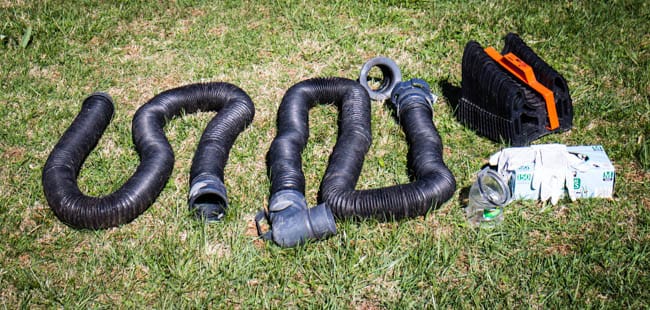
Most new RV’s come with a free dump hose that looks like this:
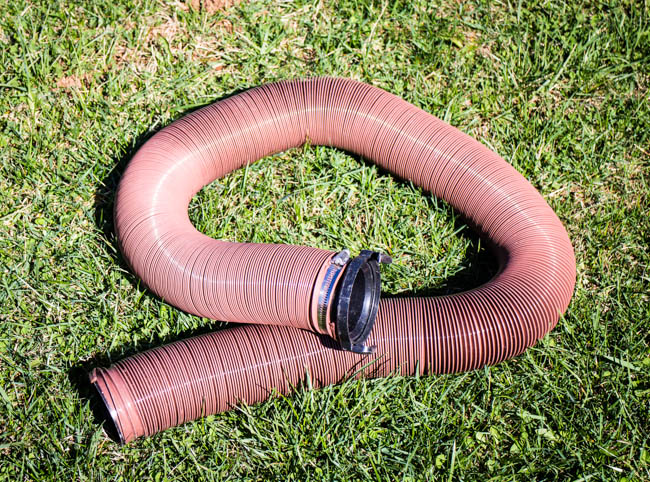
The first thing you should do is find the nearest dumpster and throw this piece of junk sewer hose away! (Well technically you should purchase a new one before you throw the free one away) Why? The factory sewer hose (typically) doesn’t come with attachments and worst, it will only last a season or less, before springing a leak (or worse). A good hose is worth every penny (trust me from experience)! Here are the 2 hoses we have owned and both have withstood the test of time and quality (you can purchase them directly from our awesome travel store):
- RhinoFLEX 15′ Sewer Kit – I’ve been using this hose for the past year and I like the way it accordions down into such a small size. I didn’t think the screw on removable bayonet would work well, but it hasn’t let me down yet. If the hose lasts as long as our Smart Drain I’d say I like this one best. Don’t forget to purchase the extension (RhinoFLEX 10′ Sewer Hose Extension

), you want to have a minimum of 25 feet with you, plus if the main hose fails you can use the extension as your main hose till you can order a new one.
- Thetford SmartDrain Sewer System – I have this hose still…after 3 years of full-time use! The hose is just now beginning to have issues: I had to order a new connector (SmartDrain RV Valve Adapter

) which cost $13, but once I replaced it the fitting is just like new! Can’t believe it. I originally purchased the 15’ Smart Drain and the SmartHose 15′ Sewer Hose Extension. (The only reason I purchased the Rhino hose was to test it out for comparison while I was waiting on the valve adapter to arrive)
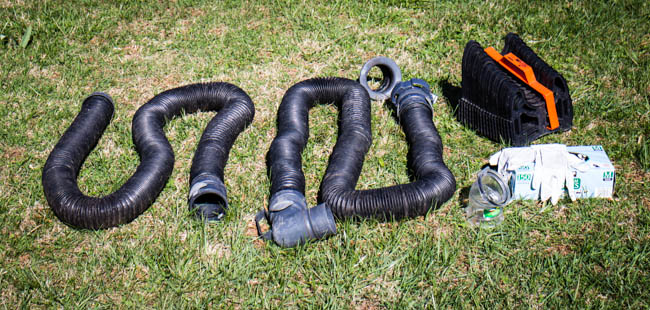
Here are the other items I use on a regular basis for dumping our RV tanks:
- 45 degree Clear Sewer Hose Elbow so you can see what’s coming out: 45° Clearview Sewer Adapter 3″

- A 50 foot water hose used exclusively for dumping the tanks (its not safe to use your drinking hose for this), we have an old hose but I would order this one now: Expandable Garden Hose

- Gloves; I use disposable because the reusable type can get just as much bacteria as your sewer line after using a few times (I’ve had the same box for over 1 year). Also make sure you purchase the gloves 1 size larger than you need, the larger size makes them easier to put on and take off: Nitrile Glove – Powder Free, Latex Free

- Sewer Hose Support to help keep your drain off the ground and provide a downward slope for the liquids to travel down: Camco 15′ Sidewinder Plastic Sewer Hose Support

Purchase the sewer hose first, once you receive the hose then purchase a clear elbow. Some RV’s need a straight clear piece, some are better with a 90 degree, or like on our Fleetwood a 45 degree was best. It’s always a good idea to carry a back-up sewer hose, or an extra extension and fittings just in case; typically I am not one to recommend carrying extra junk but in this instance it’s not a bad idea because when you need to dump…you need to dump!
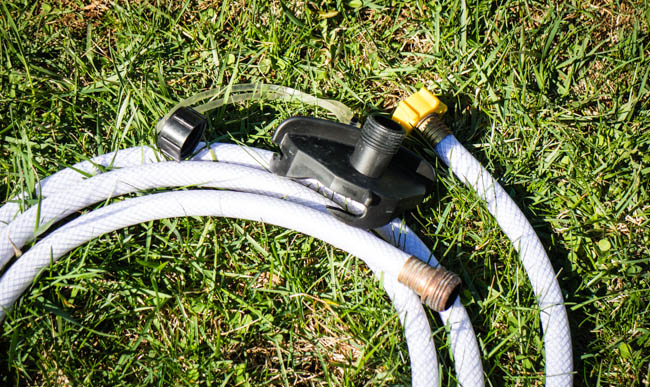
I have just started testing a new makeshift dumping system for discrete use for releasing grey water during wild camping, or for emergency backup use at campgrounds. I cannot officially recommend this as I’m still awaiting return emails from BLM and National Forest offices on the legality of grey water dumping. So far the test has worked well, here’s the links for the items I purchased on Amazon to create this concept:
- A Cheap 25 foot Freshwater hose: 25′ Drinking Water Hose

- A Sewer Cap with Hose Connection: Sewer Cap with Hose Connection

This is the “How To Dump” stuff I covered in the video
Put on your gloves and connect the sewer hose, make sure the connection is tight. If necessary use a sewer hose support to get a natural slope to the sewer drain.
Lightly open the grey water tank by pulling the ‘grey’ handle. Confirm there are no leaks and close the handle.
Pull the black handle firmly to open the black tank, let the tank drain completely. With the black tank still open connect your sewer specific water hose to the Black tank flush. Turn on the water and let the built in spray nozzle clear out any leftover waste in the tank, this will take 3-5 minutes, or until the water comes out mostly clear.
This step is controversial so attempt at your own RISK: Push the black handle in and let the “Black Tank Flush” water spray for an additional 2-3 minutes, DO NOT LEAVE DURING THIS TIME or START ANOTHER PROJECT as you do not want to get distracted during this process. Open the black valve again till the bulk of the water has come out, then repeat. When the black tank is clean you should see mostly clear water coming out. Turn off the water and close the black tank by pushing in the black handle.
Now pull the grey handle to empty the grey water tank. Always dump grey water second to help flush out any waste that may be leftover from the black tank.
Once all the water has emptied push the grey handle to close the grey tank and remove the sewer hose. Cap the sewer connector to keep any sewage from dripping into the bay. Add your favorite tank enzyme to the black tank after each dump, and add an enzyme to the grey tank every 4 dumps.
Rinse the sewer hose with water to remove any leftover sediment. Disconnect the sewer hose from the sewer pipe and rinse. Once the sewer hose is thoroughly rinsed spray the connectors with a disinfectant to kill any remaining bacteria, we use a vinegar and water mixture. Spray everything including the black and grey handles, the sewer line, the floor of the wet bay, the spigot where you connected your hose…etc.
If you have a composting toilet like us then you may want to consider combining the black and grey tanks, check out our ‘how to combine’ post here: https://www.gonewiththewynns.com/combine-rv-black-grey-tank
As you can see dumping the tanks is simple and only takes a few minutes to complete, the trick is knowing what not to do. There’s plenty of dump specific things to keep in mind like don’t drag the hose on the gravel when its full, don’t repeatedly step on the hose, and so on…but I have to leave a few mistakes for you to make on your own!
Share your dumping horror stories below in the comments. If it’s too embarrassing just use a pseudonym! Nothing beats potty talk, especially when it’s an RV (Robin Williams movie) style mistake…oh baby just let it all out! If you have any tried and true RV dumping tips feel free to share those as well.
Remember these are our recommendations from our personal experience, we can’t guarantee your success so make sure you read our disclaimer and do your own research. We have all the items listed in Our Travel Store if you want to purchase anything we’ve recommended, you pay the same and we get a few cents from Amazon.


